
.svg)
Getting Started with Pontem Wallet


.png)
Pontem Wallet is a multichain crypto wallet built for Aptos, Solana, Ethereum, and more. Your wallet is your passport to crypto: buy, send, and receive tokens, connect to exchanges and other apps, and much, much, more.
Pontem Wallet has been audited by three separate firms (Ottersec, Halborn and Zellic), so you can rest assured that your assets are safe.
In this tutorial, we’ll cover the basics of using your wallet.
Downloading Pontem Wallet
Pontem Wallet is available for iOS, Android, Chrome, Firefox, and Huawei AppGallery.
For iOS and Android, just download the app on your phone. For Chrome and Firefox, install the add-on in your browser.
Making your first account
After downloading the app, tap the Get Started button.
If this is your first time using Pontem Wallet, tap Create Wallet. (To restore an existing wallet, tap Import Wallet then enter your Secret Recovery Phrase.)
Just like that, your wallet will be created! This next step is very important: notice the purple bar at the top where it says “Please save the recovery phrase.” Tape the Save button on the right.
Your Secret Recovery Phrase is how you access your account if you get locked out of the app or need to access it from another device. Write it down and store it securely. If you lose it, you will permanently lose access to your account and any funds there in. There is nothing Pontem can do to recover it for you.
The app will give you a test to make sure you have written down the Secret Recovery Phrase. You can also save it again by hitting the Save banner, or access it again in the settings.
Once completed, hit the Set button in the top right corner to create your password. This password is used to secure and unlock your account on this device only.
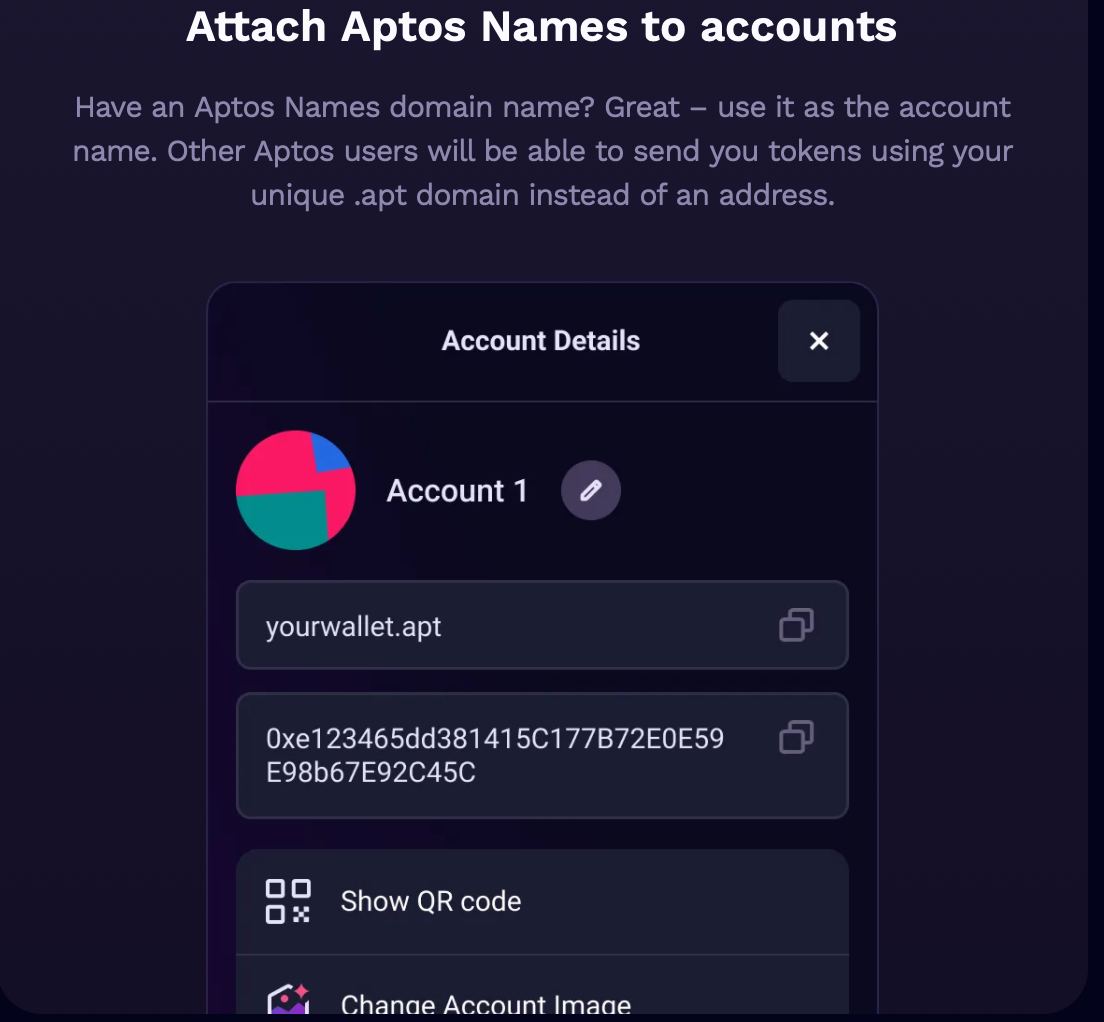
If you have an Aptos Names domain, you can attach it to your account in the Settings. Other users will be able to find you with it instead of your address.
Buying tokens
To get started on Aptos, you’ll probably want some APT or other crypto. Hit the Buy button to get started.
Pontem Wallet has integrated three payment processors: MoonPay, Transak, and Coinbase Pay. Choose one and follow the instructions to purchase crypto with a credit card, Apple Pay, PayPal, CashApp, and more. You may need to input your name, address, and other information in order to comply with Know-Your-Customer requirements.
Pontem Wallet will automatically put your wallet address as the recipient for the transaction. After you finish, you will see your new crypto in your wallet.
Swapping tokens
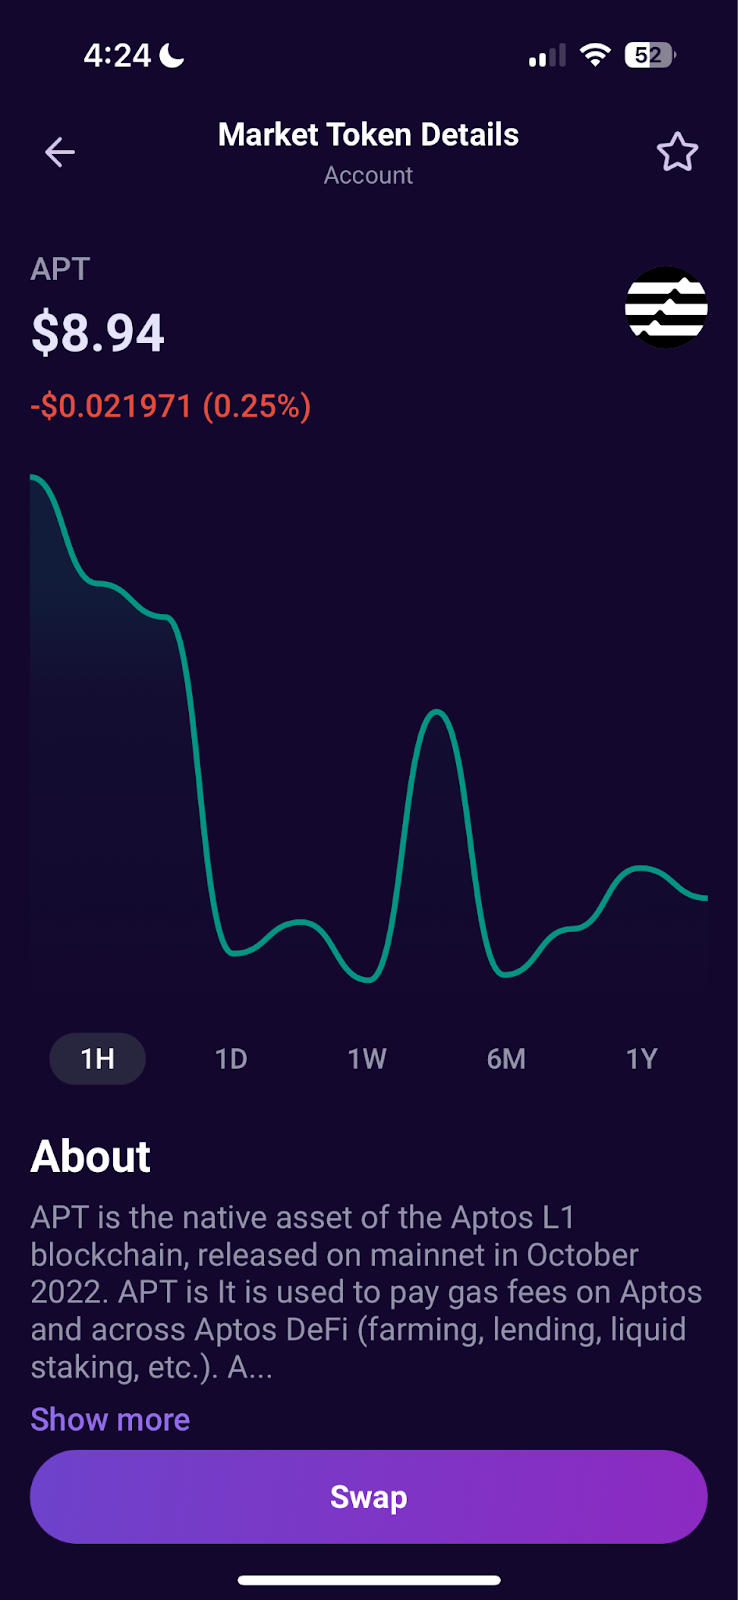
Pontem Wallet has our Liquidswap DEX built in, so you can trade tokens directly from your wallet. The Markets tab of the homepage contains a list of popular tokens. Hit one to see information and price charts.
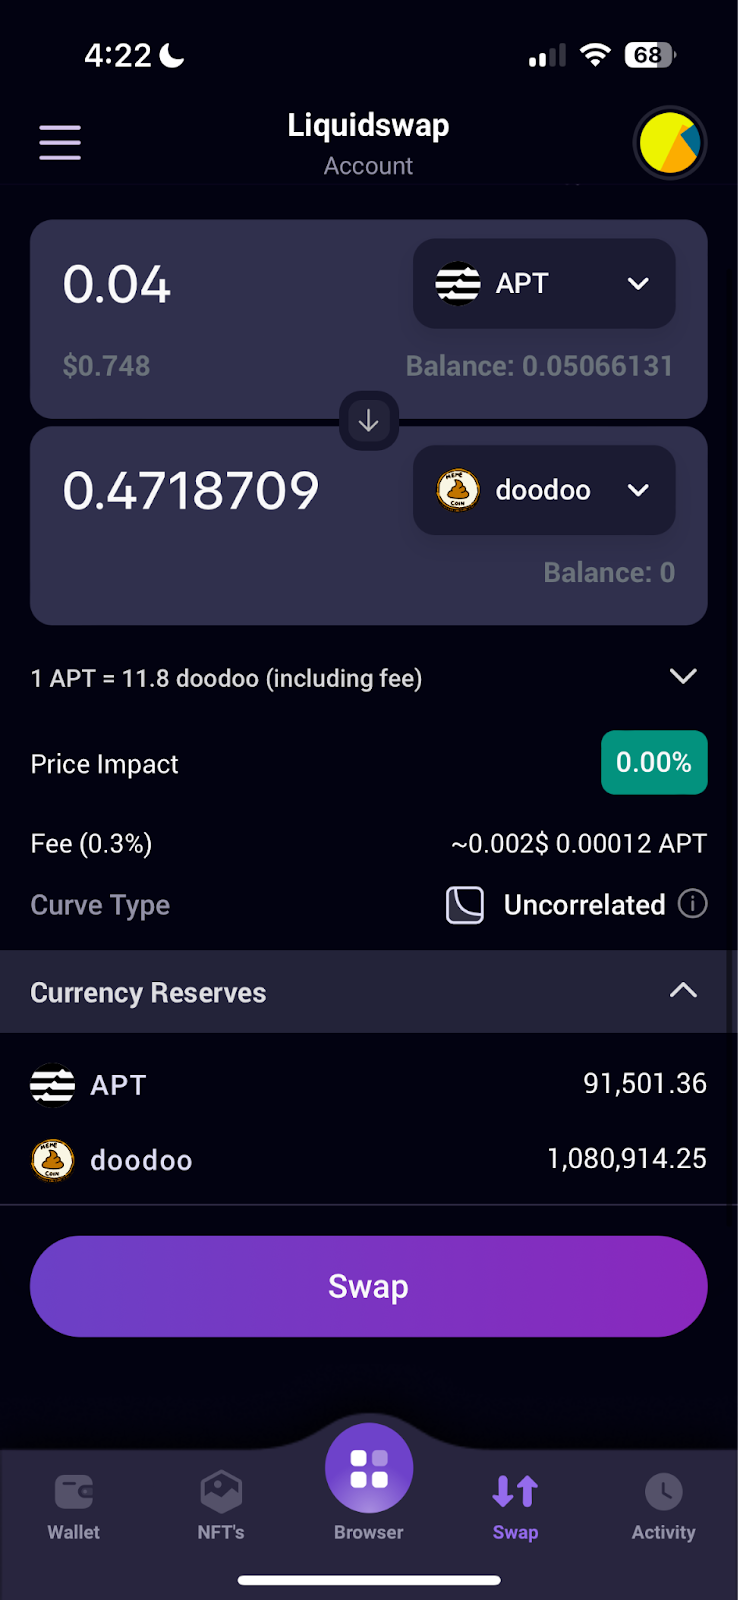
The Aptos blockchain requires you to register tokens before swapping them. To do this, hit Add Token on the homepage and choose your target tokens from the list. A very small gas fee will be charged in APT.
Then, go to the Swap tab. Enter the amount you wish to swap and Pontem Wallet will pull current prices, gas fees, and slippage data from Liquidswap. (A complete explanation of price impacts, slippage, and gas fees can be found here.)
Confirm the transaction, and wait for it to process. Note that blockchain transactions can take a few minutes depending on traffic, though Aptos has exceptional time-to-finality. Your new token balances can be found on your wallet homepage.
Pontem Wallet also supports bridging and staking – more advanced DeFi strategies for earning passive income. For more on that, check out our detailed tutorials.
Sending and receiving tokens
To receive tokens from someone else, you will need to give them your wallet address or have them scan your QR code. Tap Receive. Then, copy your wallet address or Share Address to send it. Or, hold your QR code up to their phone camera.
To send tokens to someone else, you will need their wallet address or QR code. Simply paste their address into the text bar, or tap the square icon in the corner to open the camera to scan their code. Confirm the transaction to send your tokens.
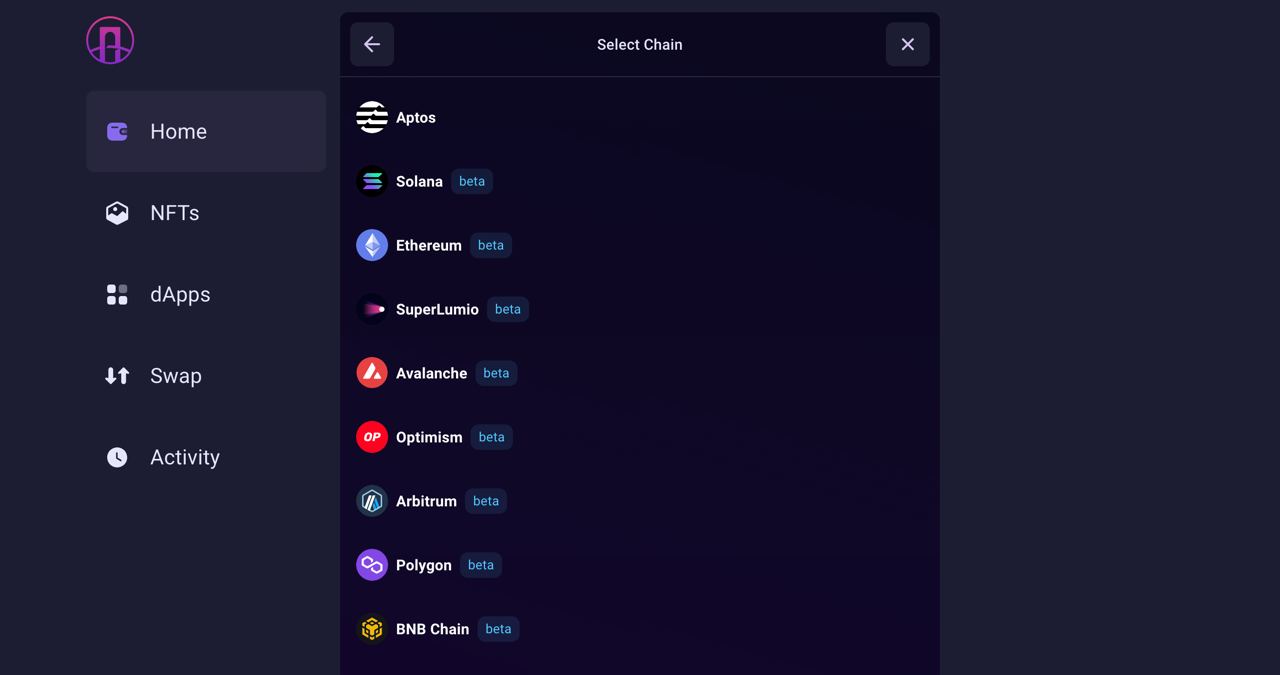
Pontem Wallet’s multichain feature is currently in beta. Use it to send and receive tokens on many different blockchains, including Solana, Ethereum, Polygon, Optimism, and more. Continue reading the article to learn how to use EVM networks in the Pontem Wallet.
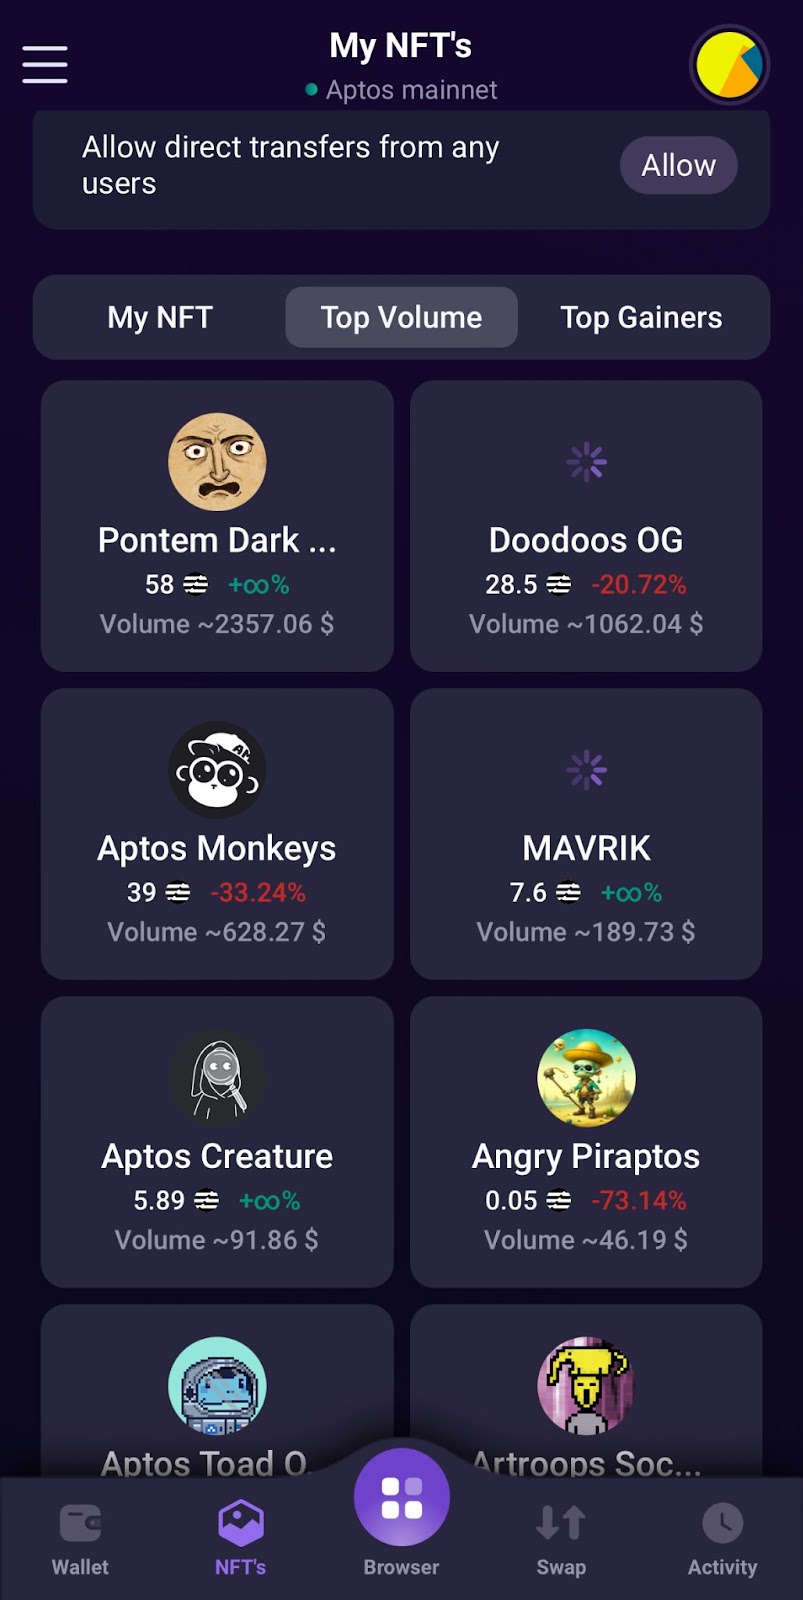
Manage your NFTs
Go to the NFTs tab using the button on the bottom menu to see your collection. Explore leading Aptos NFT collections under the Top Volume and Top Gainers tabs. You can then mint and buy NFTs directly from Topaz within the wallet.
Tap “Allow” on the tap to accept direct transfers from other users. Only do this if you are expecting to receive an airdropped NFT.
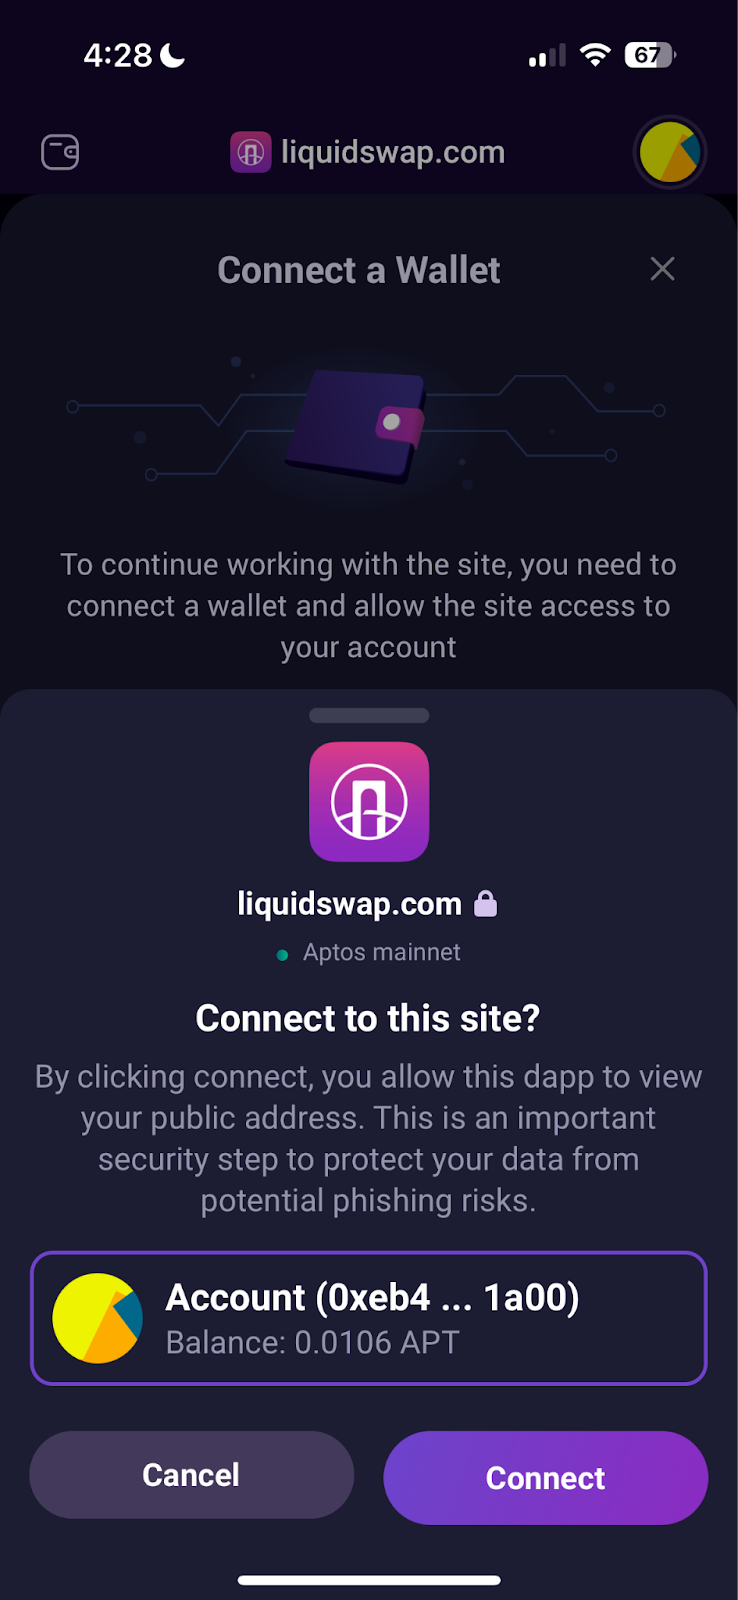
Connecting to decentralized applications (dApps)
Pontem Wallet is your passport to decentralized applications in the Aptos ecosystem. Pontem Wallet is integrated with every major dApp on Aptos, including our Liquidswap DEX/AMM, Topaz and Mercato and Wapal NFT marketplaces, Merkle trade leverage trading platform, Amnis Finance liquid staking and more.
Go to the dApps tab on desktop or Browser on mobile. You will see a list of various dApps to choose from.
Simply tap one, follow any prompts, then tap Connect Wallet. Confirm the connection to start using the dApp with Pontem Wallet. On many dApps, your Pontem Wallet account will connect automatically. You can now purchase things with your crypto, lend and stake it, and more.
Pontem Wallet can also be used with a Ledger hardware toilet. Follow our detailed tutorial here to set it up.
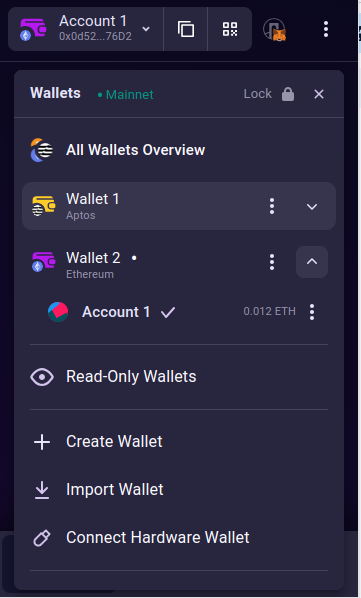
Using EVM networks in Pontem Wallet
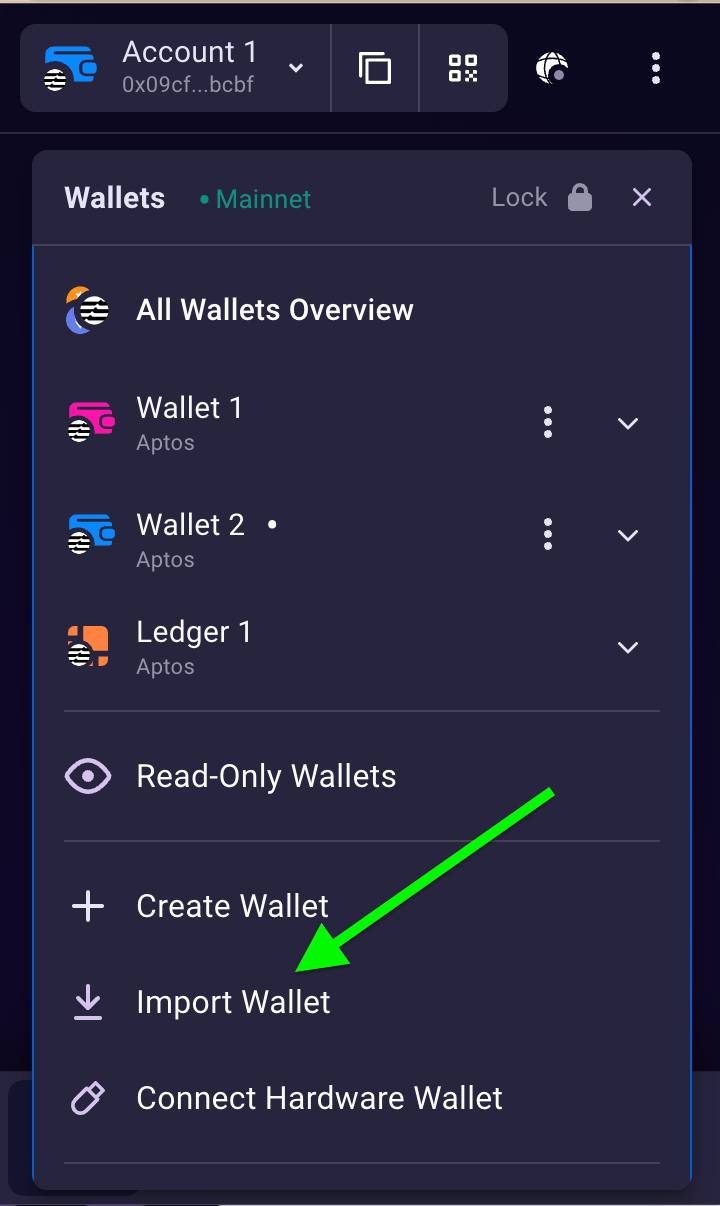
To connect Pontem Wallet to Ethereum Virtual Machine networks, follow these steps:
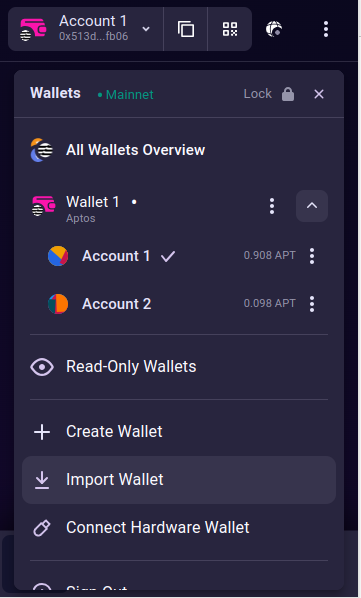
Go to the Accounts menu, then Import Wallet, then choose the network.
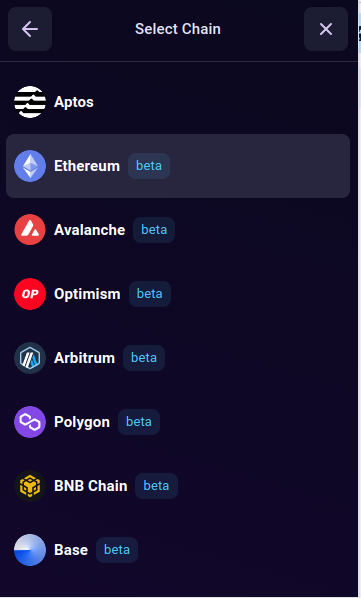
You’ll see a long list of supported networks: Aptos, Ethereum, Avalanche, Optimism, Arbitrum, Polygon, BNB Chain, and Base. All EVM chains are currently in beta, so bugs and unusual behavior can happen when you interact with dApps.
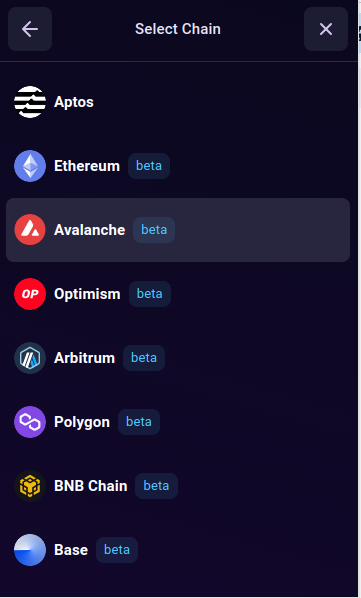
To import your MetaMask wallet into Pontem, hit Ethereum. Don’t worry about the list that says Mainnet, Lumio, etc. yet, as you can choose network mode in the next step.
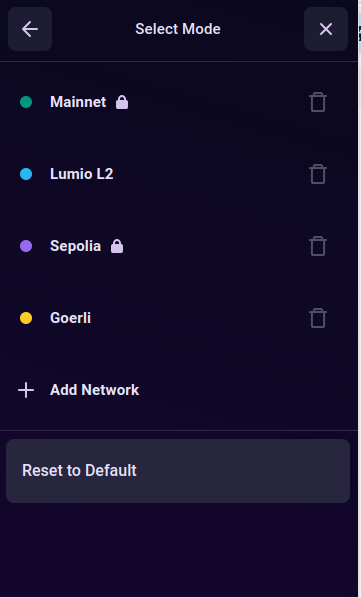
By the way, as you can see, Lumio is also on the list. This is SuperLumio, the EVM version of our revolutionary L2 rollup.
Once you’ve switched to Ethereum, click your account name, then Import Wallet, then Ethereum.
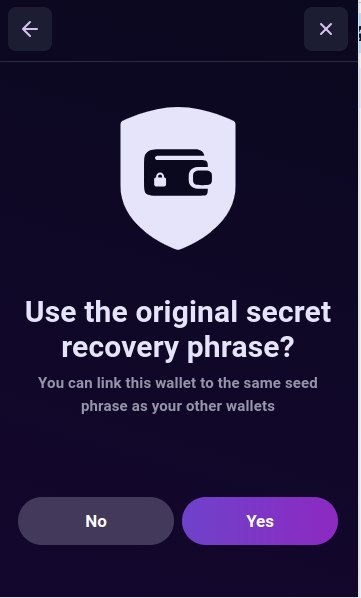
Click on NO if you’d rather just import your existing Ethereum wallet without creating a brand.
Choose how you’d like to import MetaMask.
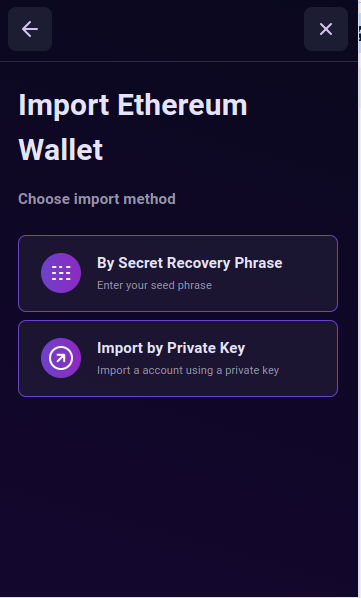
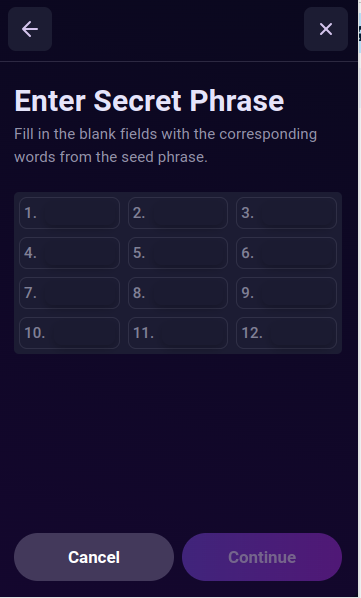
Enter your secret phrase or private key for MetaMask. Then select the accounts to import.
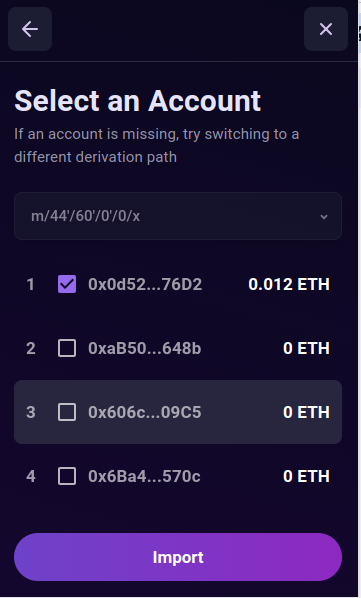
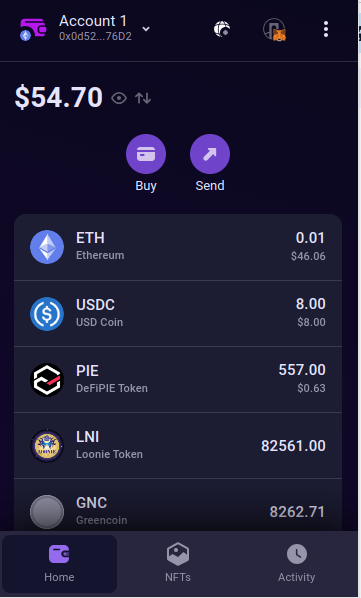
Your MetaMask accounts are now in Pontem Wallet and the network has been automatically switched to Ethereum mainnet. To go back to Aptos, hit your account name and then the Aptos wallet.
There’s no need to manually switch between networks in Pontem Wallet. It will switch automatically for each wallet.
Important! If you’d like to use your MetaMask wallet on Avalanche, Arbitrum, etc. in Pontem, you’ll need to import it again with the desired blockchain
About Pontem
Pontem Network is a product studio building foundational dApps for Aptos. Other Pontem products include:
- Lumio: an Optimistic Layer 2 for Move and Ethereum
- Liquidswap: the leading Aptos DEX
- Move Playground: a browser Move code editor
- ByteBabel: the Solidity-to-Move bytecode translator


